In this tutorial, I will show you the step by step on how to create a neon text effect in GIMP. We will use the text Tool to places text into an image, the Move Tool to adjust text position on the canvas, the Scale Tool to resize the text, and Neon filter to creates a text effect that simulates neon lighting. Let's get started!
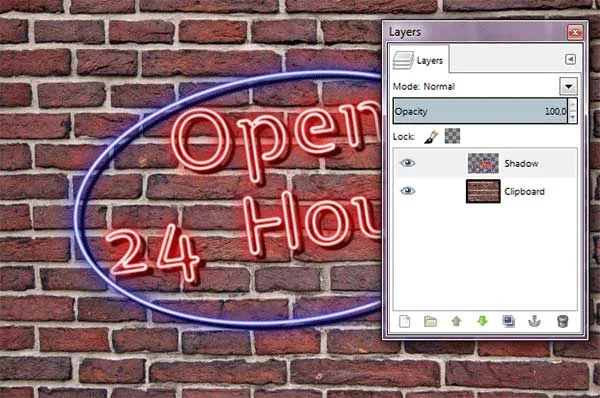
Final result.
If you liked my tutorials, please subscribe to my YouTube channel - JTSGraph.
Step 1: Install Font
Download tg_naonao font type from dafont.com. It's usually in the form of a ZIP file, and then extracts it. Once extracted, right-click the font file /.ttf, then click install.
Step 2: Download Texture
Download a texture image. For this GIMP tutorial, I'll use this image, 21534, downloaded from Pixabay.
Step 3: Create New Image
Open GIMP and then press the D button to reset the background color to default (black). Next, create a new image. Use File>New or else just press Ctrl+N. The Create a New Image dialog box appears. In the pop-up window, you can set the Width and Height of the new image manually or through the up and down arrows. Click Advanced Options, select Foreground color for “Fill with”. Click OK.
Step 4: Grab the Text Tool
To places text into an image we need to use the Text tool. Select the Text Tool from the toolbox by clicking the tool icon or else use Tools>Text.
In the Text Tool Options dialog, you can choose Font type, color, and size.
Step 5: Type the Texts
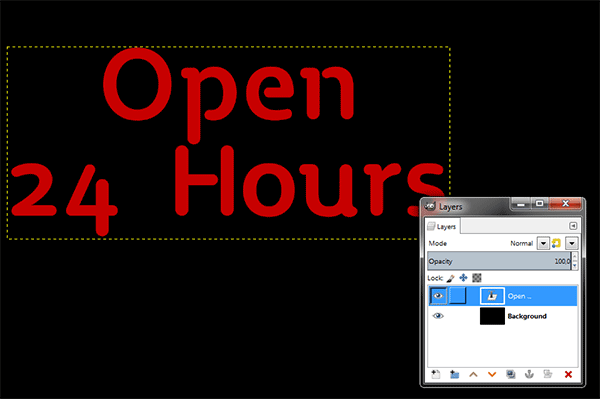
Click on any portion in the image, where you would like to create the text. Then enter the text on the canvas. Your text will appears on the canvas in a rectangular frame.
Step 6: Adjust Texts
If you need to move the text on canvas, you have to select the Move tool and click on a character to drag the frame and its text. Select the Text layer on the Layers dialog.
Select the Move Tool from the toolbox by clicking the tool icon or else use Tools>Transform Tools>Move.
Just click and drag on any portion of the text. The text gets moved as you move the cursor.
Step 7: Resize The Text
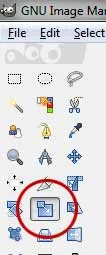
We'll use the Scale Tool to adjust the size of the text. Select the Scale Tool from the toolbox by clicking the tool icon or else use Tools>Transform Tools>Scale.
The Scale dialog box appears. Here, you can set Width and Height you want to give to the text or you can just drag handles in the text. Click the Scale button when you're done.
Step 8: Make Selection In Text
The next step is to make a selection around the text Choose Layer> Transparency> Add to selection. You'll see marching ants around your text. GIMP loads selection outlines that correspond to the shape of your text. Now you have the selection on the text.
Step 9: Shrink Selection Then Delete
Contract selection by going to Select>Shrink. The Shrink Selection dialog box appears. In the Shrink Selection text box, enter the amount by which to reduce the selection. I will set the Shrink value by 35 pixels. Click OK. Now go to Edit>Clear or else just press Delete key to delete everything in the current selection.
Step 10: Apply Neon Filter
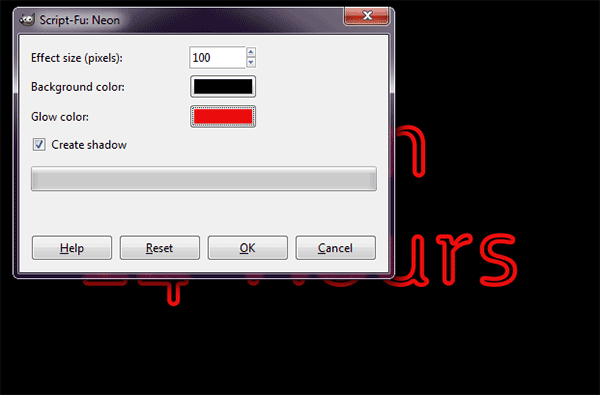
Use Filters>Alpha to logo>Neon. The Script-Fu: Neon dialog box appears. Enter a value for the effect size in the Effect Size (pixels) text box. Also, choose the Background and glow color. Click OK. This filter creates a text effect that simulates neon lighting.
Step 11: Delete the Background layer
The Neon filter creates four layers to achieve the neon effect, the "Neon Tubes" layer, the "Neon Glow" layer, the optional "Drop Shadow" layer, and the "Background" layer. Delete the Background layer if you should like to use your own background image.
Step 12: Apply a Gaussian Blur Filter On Neon Glow
Select the “Neon Glow” layer on the Layers dialog. Apply a Gaussian Blur Filter by going to Filters> Blur> Gaussian Blur. The Gaussian Blur dialog box appears. Adjust the blur intensity by entering the horizontal and vertical values. Click OK.
Step 13: Merge Down All Neon Layer
Select the “Neon Tubes” layer on the Layers dialog and then choose Layer> Merge Down. The Merge Down command merges the active layer with the layer just below it in the stack. Repeat this step until all Neon layer merged.
Step 14: Rotate It
Click the Rotate tool icon, then click on the neon text.
Step 15: Insert a Texture
Use File> Open As Layers command in the top menu (or just pressing Ctrl+Alt+O) to open the image you'd like to insert. The Open Image as Layers dialog box appears. Navigate through your folders and click on the image, then click Open.
You can now edit the image as follows:
- Use Tools>Transform Tools>Scale command to resize the image. Click anywhere inside the image. In the Scale dialog box, click the chain icon to keep the image does not distort. Enter new values for the image's width and height manually or through the up and down arrows. Press the Scale button when you are done.
- Use Tools>Transform Tools>Move command to move the image. Click and hold anywhere inside the image and drag.
- Rotate the image by using Tools>Transform Tools>Rotate, a Rotation Information dialog is open. Set the angle, center X, and center Y, and click the Rotate button.
- Press Enter key when you are done.
Step 16: Adjust Color Using Curves
We need to adjust the color, brightness, and contrast of the texture layer using the Curves Tool. Select the texture layer on the Layers dialog. Use Colors>Curves to activate the Curves Tool. The Curves dialog box appears. We create anchors and segments on the curve and we move them to shape the curve. If you click on the curve, a new anchor is created. You can click-and-drag on the curve to bend the curve. Moving the anchor of a pixel downwards makes this pixel darker.
Step 17: Save Document
Use File>Save command in the top menu or else just press Ctrl+S to save your project file. The Save Image dialog box appears. Navigate to the folder where you want to store your project file. Type a name in the Name text box and leave the default GIMP (*.XCF) format. XCF is GIMP's native format and is useful because it stores everything about your image and will allow you to later edit your image in GIMP, in case you notice a problem. Click Save to store the project file.Once you have finished, you will probably also want to export the image in a more widely used format, such as JPEG, PNG, TIFF, etc.
There you have it! How to create neon text effect in GIMP.


How is blue boundary created?
ReplyDeletehello nice work my son hates this
ReplyDeleteI’ve been reading numerous articles on this topic but found this one uniquely written. Thanks. Custom Neon Sign Columbus Ohio.
ReplyDelete